Compound III: Scenarios, Migrations, and Workflows
Testing protocols on blockchain networks is a new discipline in software engineering. The Compound protocol code base is under test through multiple frameworks. First, there are unit tests for the Solidity smart contract functions which are written in JavaScript with Mocha.js. And second, there are “scenarios” which are like integration tests. Scenarios abstract away the minutia required in a sequential series of EVM transactions to simulate a real-world protocol interaction as an easy to follow story. Developers can build a suite of properties that can be checked on any deployment of the protocol with assumptions used to capture the prerequisites for testing those properties. Third, there are migrations, which are protocol upgrade scripts that can also be run in test mode like a scenario. In this guide, we’ll build a scenario and a protocol migration and check it using the custom test suite. We’ll also walk through creating a proposal with this migration using continuous integration.
The Compound protocol has grown to hold billions of dollars worth of assets and every governance proposal has the potential to create novel attack vectors that threaten the security of those assets. Unit tests and scenarios catch bugs before code is deployed to production. It is very important for community developers to write tests that demonstrate their code functions as intended, is lacking vulnerabilities, and operates in-harmony with its on-chain dependencies.
Further defense against bad code is made possible by auditors like OpenZeppelin, ChainSecurity, and Certora. The work they do is invaluable, however we must write strong tests before auditors dive in or there will be a lack of robustness to the security of our code changes.
This guide covers the most important processes a developer must undertake when making a change to the on-chain Compound III protocol. A video demonstration of everything covered in this guide is available in the screen recording of the Compound III office hours meeting. Here is a table of contents for this guide:
Table of Contents
- Comet and its Configurator - Important details of the Compound III protocol architecture.
- Setting up Comet - How to get the source code from GitHub set up in - your local development environment.
- Creating a Scenario for Comet - How to create a new scenario test for the protocol code. Also a walkthrough of using the CI suite.
- Creating a Migration for Comet - How to create a migration, which prepares and enacts a governance change proposal for Compound III using code.
- Running a Production Migration in Workflows - How to simulate or literally run a migration script using GitHub Actions CI.
Comet and its Configurator
Compound III has an opinionated design that embeds security into its upgrade process. Upgradability with little restriction carries additional risk, like we have seen so far with Compound v2. All of the parameters of a deployment of Compound III are managed by a contract called the Configurator. This special contract deploys and sets all of the parameters for the instance. In order to change the core implementation of the protocol, the configurator contract must be redeployed, which should not be common.
For smaller, expected protocol changes, the Configurator has built-in setter functions that employ checks to ensure the parameters changed by governance are valid.
When implementing a protocol change, it is important to write relevant unit tests, scenarios, and migration scripts. New unit tests and scenarios are necessary if there is a change to the Comet implementation containing novel functionality. All protocol changes, even small ones, should have an accompanying migration script. The GitHub Actions workflows for the Comet repository have safety checks executed when a pull request is made. In this guide, we’ll build a scenario and migration and run the test suite locally and as a workflow in GitHub Actions.
What is a workflow? GitHub provides a Continuous Integration (CI) environment called Actions. The workflows in the Comet repository are the common tasks that run within CI. These custom workflows can run tests, deploy changes on-chain via migration script transactions, and even run code linters.
A new code change or a parameter change that causes workflows to fail in a pull request should not be allowed to go to an on-chain governance proposal. It is imperative to first ensure coverage and testing is applied appropriately before governance attempts changes.
Before we begin development, let’s go over setting up the Compound III repository on a local machine.
Setting up Comet
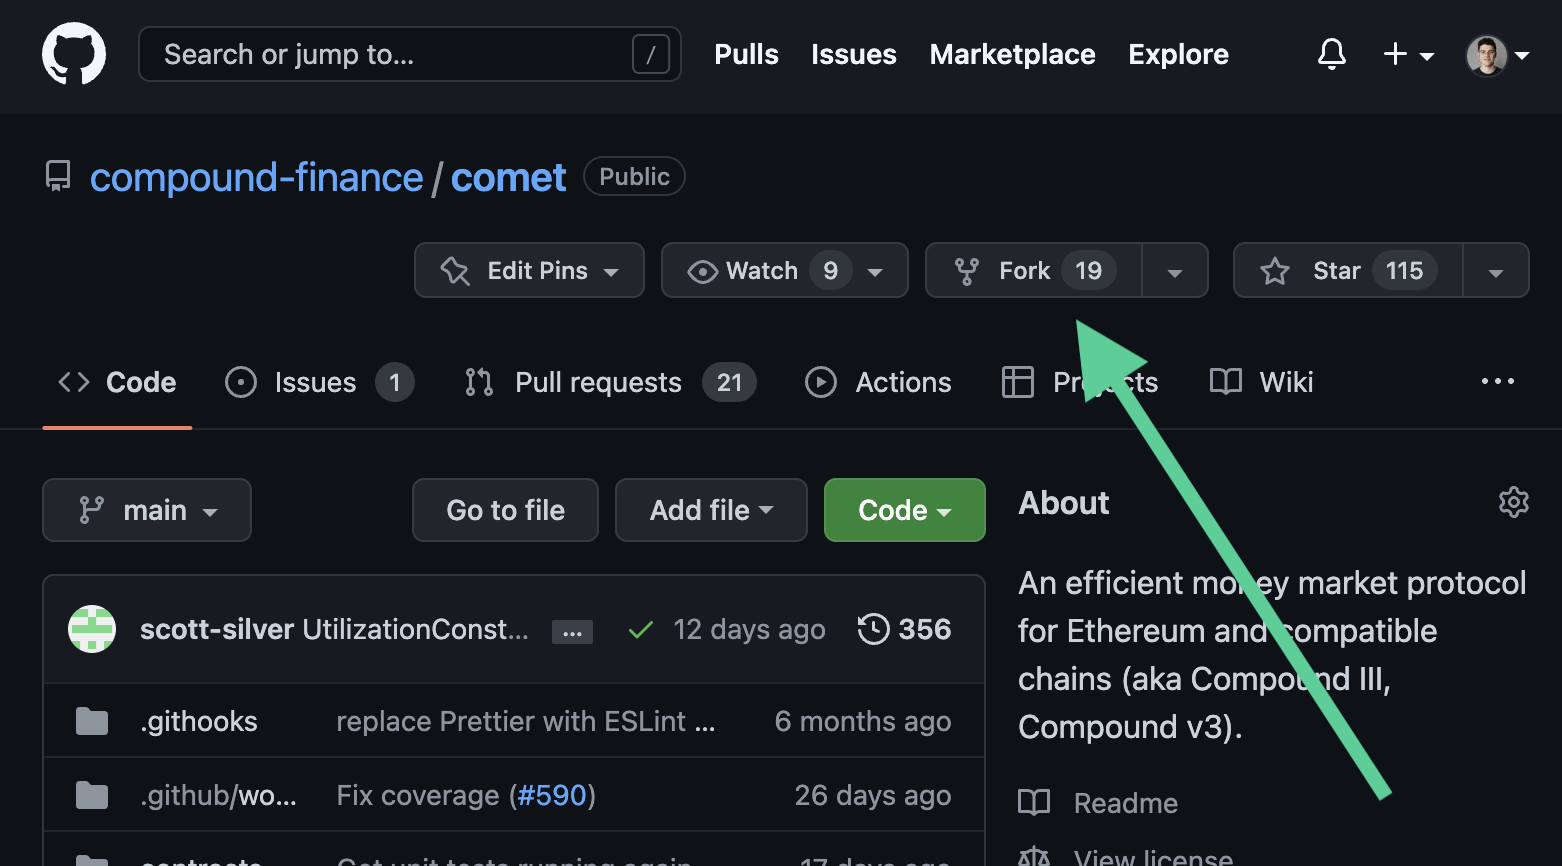
In order to begin Compound III development, we first need to fork the Comet repository. Go to GitHub and make an account. Then go to the official Comet repository and click the fork button on the top right.
Once we have a fork of the Comet repository within our account, we can clone it to our local machine. A fork is necessary for a later step, which is making a pull request into the official Comet repository in order to demonstrate and merge code changes. Click the Code button, then the SSH tab in the popup, and then the Copy button for the repo SSH URL.

Next use the command line to clone the repository to a folder on your local machine. Be sure to first install Node.js and Yarn if you haven’t already.
git clone git@github.com:ajb413/comet.git
cd comet/
yarn install
yarn build
Once we install dependencies and build the smart contracts, we can run the existing scenarios, and ultimately our newly authored scenario.
Creating a Scenario for Compound III
The scenarios Hardhat plugin is a tool that simplifies running several EVM transactions as a single test to ensure smart contract functions inter-operate as intended. The Comet repo already has many scenarios that cover the original codebase and all deployed instances on all blockchains.
Before we can run the full set of scenarios, including a new one that we will write, we need to first set some environment variables that the suite will use to fetch existing data from supported blockchains.
## Required
INFURA_KEY=xxxxx
ETHERSCAN_KEY=xxxxx
WALLET_CONNECT_PROJECT_ID=xxxxx

## Optional, dummy string is acceptable based on your case
SNOWTRACE_KEY=xxxxx
POLYGONSCAN_KEY=xxxxx
ARBISCAN_KEY=xxxxx
BASESCAN_KEY=xxxxx
CERTORAKEY=xxxxx
LINEASCAN_KEY=xxxxx
OPTIMISM_ETHERSCAN_KEY=xxxxx
QUICKNODE_KEY=xxxxx
Each of the above environment variables needs to be set in the command line configuration (bash profile, zsh profile, etc). The first key is for a JSON RPC URL connection with Infura (free). The others are free API keys for Blockscan explorers that index EVM chains like Ethereum’s Etherscan.
The WalletConnect v2 project ID variable needs to be set in order to use Seacrest. You can acquire this project ID at walletconnect.com. More context on using Seacrest to sign transactions can be found below.
Once the API keys are set, all of the scenarios can be run locally with a single command. The deployments on the corresponding chains are referenced in the deployments folder of the repository. Each scenario execution tests the migrations in the deployment folders as well (more on that later).
npx hardhat scenario
To run the scenarios for a single chain, like Ethereum mainnet, add the --bases <chain name> flag and value.
npx hardhat scenario --bases mainnet
More information on scenario tests can be found in the repository README.md file, and also in the SCENARIO.md file. To create a new scenario file, we will run these commands:
cd scenario/
touch AddZrxCollateralScenario.ts

## After this be sure to navigate back to the root folder of the repo
cd ..
The scenario that we will write adds ZRX as a collateral token to Ethereum mainnet’s USDC base instance of Comet. This token is a good example for integration because it has an existing price oracle contract which is needed for Compound III collaterals. The token also has a standard ERC-20 interface. However, including this specific scenario will result in failing tests for other chains, which will be explained later.
Typically scenarios should be added when introducing a fundamentally new protocol feature, and should always pass in all deployments of the protocol; this particular scenario that we’ll be walking through does not and it is only for educational purposes. We will test the scenario against mainnet but eventually delete the Git branch.
The scenario does a few on-chain actions in a local fork of the live blockchain. The node that is run on the local machine allows us to submit transactions as if they were legitimate, and we can examine the outcome to ensure our eventual changes will be proper.
Here are the actions performed in the scenario:
- Import the existing ZRX token and the Chainlink price feed into the test system.
- Move ZRX tokens to our test account from a whale holder so we can test them with Compound III.
- Set up the Compound III asset configuration to be added as collateral in an on-chain governance proposal.
- Execute the test governance proposal by adding the asset as collateral and re-deploying the Comet implementation properly using the Configurator.
- Approve and then supply ZRX collateral to the protocol from the test account.
- Borrow the base asset against the supplied collateral.
- Confirm that resulting balances are correct.
This new scenario demonstrates adding an existing ERC-20 token as collateral to an instance of Comet. Checking in this scenario is not necessary if the contributor creates a migration script for the specific change. The reason for this is because migrations are run in CI like scenarios before they can be merged. This ensures that the change has test coverage before a governance proposal. Note that there is already an existing scenario for adding a new collateral (see DOGE within GovernanceScenario.ts in the scenario folder). That scenario is generic enough to run for all instances on all chains.
We can run our scenario locally to make sure that it works as intended. Run it by using the same aforementioned command with the bases flag for mainnet. Note that the script assumes that the price of ZRX is high enough to use it as collateral for the borrow step. If you are following this guide at a block height (time) when ZRX is at a significantly lower price, you may need to adjust the supply and borrow amounts to meet the collateralization requirements of the protocol.
[mainnet] Running add new asset zrx ...

[mainnet] ... ran add new asset zrx on 1 solution


✅ Results: 1 success, 0 errors, 190 skipped [avg time: 7900ms] [total time: 7900ms] [mainnet]
You may notice that our single scenario was run instead of every scenario. This is because the script we wrote uses the .only method which tells the plugin to run our one scenario. This makes things easier when working on just one scenario. To have CI run all scenarios, we should remove .only. This is important to do before we check-in the code.
Next we’ll run the scenarios within our CI workflow. In order to do this, we need to commit our code and push it to GitHub. Remember that we will delete this later after we have learned how to use workflows.
## Make sure we are in the root directory of our forked repo
cd comet/

git checkout -b example-scen
git add .
git commit -m "Created a scenario for adding ZRX as collateral to Mainnet USDC"

git push origin example-scen
Let’s go back to the forked Comet repo in GitHub. Click the Actions tab at the top of the page and then the green button that says I understand my workflows, go ahead and enable them. This sets up the same workflows defined in the official Comet repository at the commit in which we forked. We can run them independently from the official repository.

Next we need to add the same environment variables as Actions secrets in the repository like we did for the command line earlier.
Click on the Settings tab on the top right, then Secrets on the bottom left, then Actions subtab, then the green New repository secret button on the top right.

Once you have added all of your keys, you will be able to run the workflows in your fork. Make sure that the keys are Repository Secrets under Actions. The Environments setup will not work. Running tests in your fork CI is an excellent check to do before opening a pull request on the official Comet repository. If your branch is up to date, all passing tests in the fork CI will result in passing tests in the pull request to main.
Next click the Actions tab once again. Click the Run Scenarios workflow on the left, then click the Run workflow button on the right, select your branch in the dropdown menu, and then click the green Run workflow button.

The workflow will take several minutes to run. Our scenario is not generic enough to succeed on all instances of Comet. The reason is because the ZRX token and Chainlink price feed smart contracts are nonexistent at the specified address on other chains than Ethereum mainnet.

Another note to consider is that scenarios will check existing pending on-chain governance proposals against the test to make sure that there are no conflicts caused. This might be the cause of a failing scenario that previously succeeded, even when no code changes have been made in the interim.
Now that we have learned about what it takes to write a scenario test, run it locally, and run it in CI, we can delete this branch and apply what we have learned to a Compound III migration script.
Creating a Migration for a Compound III Protocol Upgrade
A migration script is a uniform method for creating a governance proposal that implements a code or parameter change for Compound III. We can run these scripts in “test mode” before we run them as a production transaction, so we can conclude that there will not be any mistakes with our execution.
Before we continue we will delete our old branch we made for the example scenario. The new branch with our migration can be thought of as an example of a legitimate possible upgrade for Compound III.
## Make sure we are in the root directory of our forked repo
cd comet/
git checkout main
git branch -D example-scen
git checkout -b add-zrx-collateral
Now that we have a branch set up, we can create a migration for mainnet USDC.
Just like scenarios, migrations have their own information markdown file named MIGRATIONS.md in the root of the repository. Migration scripts are made on a per-deployment basis. The migration script that we will write together can only be applied to the USDC base instance of Comet on Ethereum mainnet. Previous migration scripts can be found in the corresponding deployment folder.
We’ll use the documented command on our command line to create a new migration script in the correct directory.
yarn hardhat gen:migration --network mainnet --deployment usdc add_zrx_collateral


yarn run v1.22.19

$ /Users/adam/comet/node_modules/.bin/hardhat gen:migration --network mainnet --deployment usdc add_zrx_collateral

Generated migration mainnet/usdc/1667402436_add_zrx_collateral.ts

✨  Done in 2.56s.
The skeleton file of the new migration has been created within its deployment folder. There are two functions within the migration script that can be utilized. The “prepare” step is meant to be used to set up the chain state before a migration is deployed. An example of use of this step would be to deploy a contract like a price feed wrapper.
The “enact” step is meant to apply the intended change to the protocol via governance. This step should run the propose function on the governor using an account with sufficient voting weight. If we try to simulate this migration as a workflow in CI or on the command line it will fail. This is because our test environment account does not have sufficient COMP voting weight to make a proposal on Ethereum mainnet. We’ll go over how to test it soon.
Our migration to add ZRX as collateral to Comet will utilize the enact step.
The majority of the code in this migration was recycled from the scenario we wrote together earlier. This time, we can use the actual governance proposal interface. Scenarios have a neat shorthand to keep the code concise in the test environment. For production, we need to be a bit more verbose.
We can run this migration in test mode locally by using this command:
yarn hardhat migrate --network mainnet --deployment usdc --enact --simulate 1667402436_add_zrx_collateral
This will run the migration in test mode. The simulate flag enables testing of the migration. It will fail because the test account in the Hardhat configuration does not have the necessary voting weight on mainnet.
GovernorBravo::propose: proposer votes below proposal threshold
In order to simulate our migration, to ensure that it will eventually execute successfully on mainnet, we can pretend that we control an account that has sufficient vote weight. This can be done in “simulate mode” with a command line flag. Before we try that out, we’ll need to find a real account to impersonate in the test.
Go to the governance leaderboard page and click on any account with a green plus sign in their profile picture. Each of these accounts is able to create an on-chain governance proposal due to their sufficient COMP delegation. Copy the Ethereum address next to their name on the profile page. Now we can test-run the migration in simulate mode as a proposer.
yarn hardhat migrate --network mainnet --deployment usdc --enact --simulate --impersonate 0xaddress 1667402436_add_zrx_collateral
Running a Production Migration in Workflows
It is a best practice to create Compound governance proposals within GitHub Actions workflows via migration script. How does one sign the transaction to create the proposal in a workflow? This is accomplished using a tool called Seacrest.
The proposer can have the private key of their Ethereum account with COMP delegation on their mobile device. They can sign a transaction using a QR code that is logged by GitHub Actions. When the user runs the migration in CI, they can sign a real transaction that is broadcasted to the specific chain thanks to Seacrest. In order to try this workflow out, we’ll need to check in our migration script code.
git add .
git commit -m "Created a migration for adding ZRX as collateral to Mainnet USDC"
git push origin add-zrx-collateral
Next we can go to GitHub Actions and simulate the enact step of the migration (See instructions above if you have not enabled Actions within your fork repo). Click the Enact Migration workflow on the left. Then click the Run workflow dropdown button. Next choose the branch name, the network, the Comet instance, check the Simulate box, and Run the workflow.
There is an option to paste in a private key which is not advised. The best option is to sign the transaction via mobile phone with Seacrest.
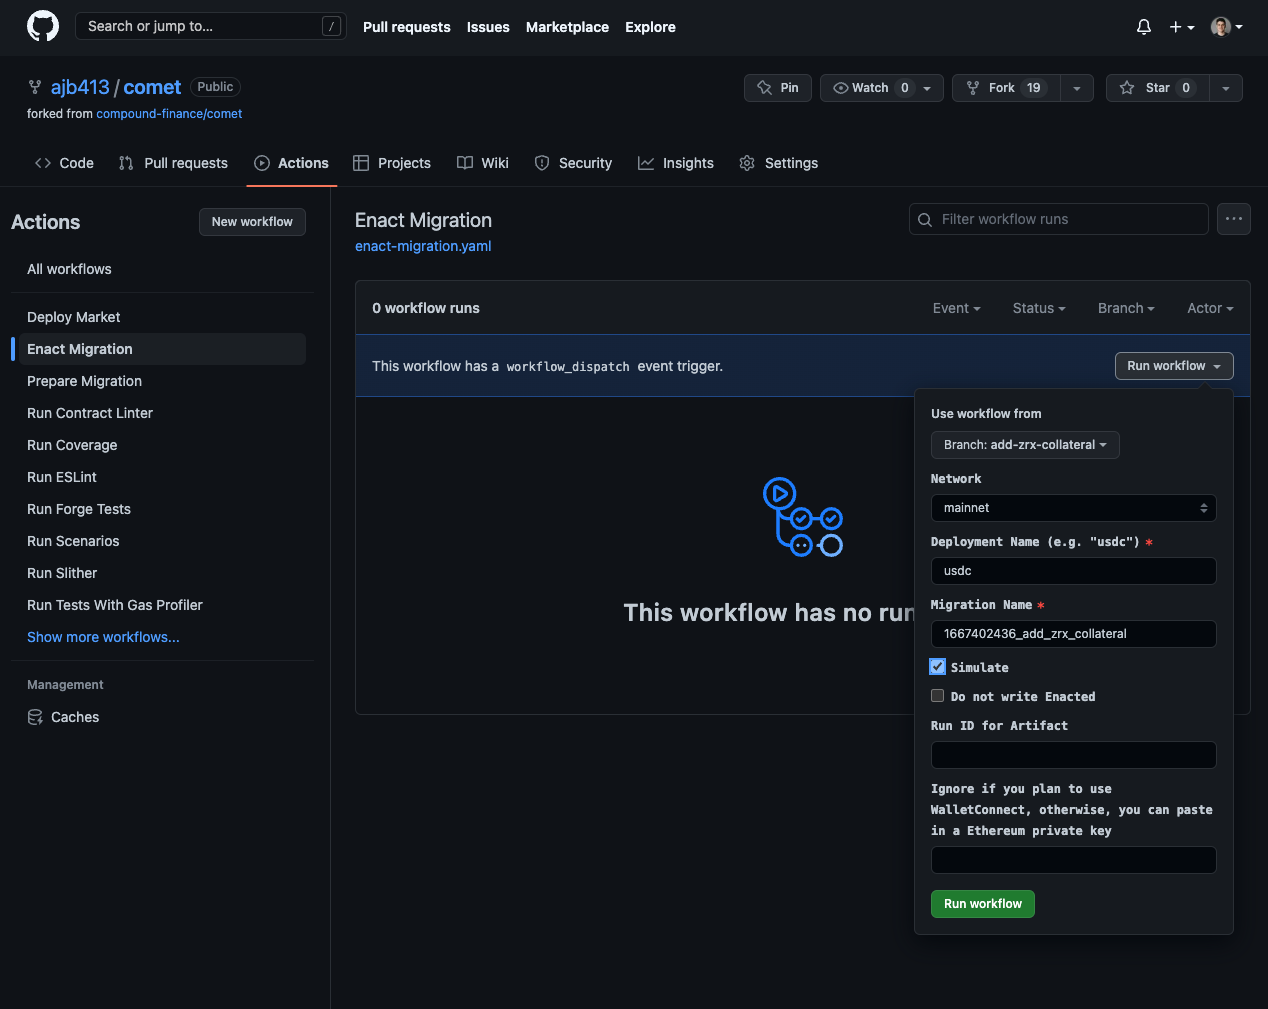
Have a mobile device ready with a QR code scanner. When the migration script runs, Seacrest will enable signing of the transaction. Once execution has successfully completed, we can be sure that our proposal will run as intended when it is time to propose for real.
In order to do that, simply untick the simulate checkbox and run the migration in CI again.
We have reviewed creating a scenario, running CI workflows, creating a migration, and running it to make a Compound III governance proposal. Based on precedent, it is best to discuss the change openly on the Compound Community Forums as well as Discord as development progresses.
Create a pull request into the main branch of Comet using the fork with the new migration script changes. The GitHub pull request interface is another supported environment to discuss code changes publicly and encourage review by fellow community members. Be sure to read the Compound Improvement Proposal process which, at the time of writing, is being solidified by community members.
Once the proposal has been publicly discussed, proposed on-chain via migration, and executed successfully after the voting period, it is a best practice to delete the migration script from the pull request before it is merged into main.
Thanks for reading and be sure to get in touch in the Protocol Development room of the very active Compound Discord server. There are community developers there and they are happy to answer technical questions and share their knowledge.